Can you cook a turkey from frozen? Yes! And you won't believe how easy it is! I wish I had known this years ago.

How many holidays did that 20 lb turkey take up ALL my fridge real estate for days?? And how many holiday mornings did I fret over a partially frozen turkey??
I have answered a lot of questions in the post below but don't let that scare you off. This is really a question of - cut off the wrapper, roast, tent, carve and you're good to go!


Cooking a Turkey From Frozen
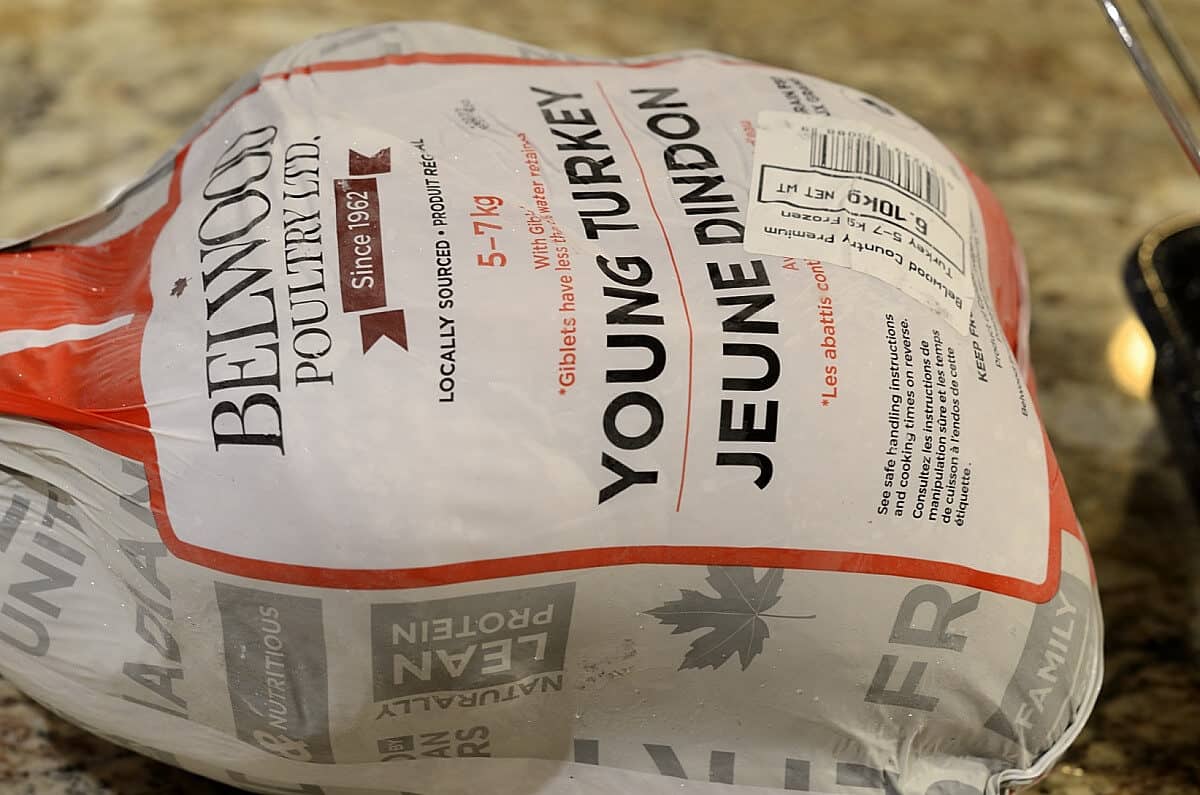
Nothing could be easier! You can literally cut the plastic wrapper off and start roasting. You don't have to worry about the gizzards within since the paper is food safe. You can take them out mid point or at the end and dispose of them.
The key to success here is:
- an instant read thermometer. To be sure the breast and thigh meat are both done to the correct temperature. One of the advantages to cooking from frozen is that the breast is denser than the thighs so when the thighs are done to temperature the breast should be just right and not over-done and dry.
- a low sided roasting pan with a rack that sits high in it or on it is the preferred method. This allows for good air circulation all around the bird and even cooking. You can use a deep sided roasting pan, covered (and preferably still with a rack under the bird) but you will have to rotate the turkey mid-cooking and check the temperatures diligently because cooking will not be as even as on a high rack.
- Allow enough time to roast low and slow - a 13 pound turkey will take 4.5 - 5 hours.
How Do I Know When It Is Done?
-Breast meat should register 160-165 degrees. It should rise from 160 to 165 degrees during the tenting.
-Thighs should register 180 degrees. Make sure you are not touching a bone with the thermometer tip.
- Stuffing, if any, must reach 165 degrees. Check it deep in the cavity - not just the mouth of the cavity. (This would be if you purchased a frozen, pre-stuffed bird.)
The good news is - the wings and thighs cook faster than the denser breast so the different parts should reach appropriate temperatures pretty close together.
If you are worried about over cooking your turkey some experts suggest cooking the breast to 157 degrees and 175 degrees for dark meat. The science indicates that after 1 minute of standing at these temperatures salmonella is killed to the same extent it is at reaching 165 degrees. For more detail on that check out ThermoBlog's post on Turkey Temperture.
How Long Does It Take To Cook a Frozen Turkey?
The rule of thumb is that a turkey frozen solid will take about 50% longer than a defrosted turkey. The ultimate determination though is the temperature as outlined above.
Cook Time Chart for Cooking Frozen Turkey @ 325 Degrees
This is a rough guide and assumes a fully frozen, unstuffed turkey. You still need to check temperatures for accuracy.
- 8- to 12-pound turkey: 4 to 4 ½ hours
- 12- to 14-pound turkey: 4 ½ to 5 ¾ hours
- 14- to 18-pound turkey: 5 ¾ to 6 ¼ hours
- 18- to 20-pound turkey: 6 ¼ to 6 ¾ hours
- 20- to 24-pound turkey: 6 ¾ to 7 ½ hours
Can I Increase the Temperature So It Cooks Faster?
This is not recommended. The turkey has to thaw before it can cook so you will end up with overcooked skin and outside meat while the deeper meat has not reached temperature.
How To Cook a Turkey from Frozen Step by Step
- Preheat oven to 325 degrees.
- Prepare a low - sided roasting pan big enough for the turkey to sit on a rack within the sides so all the juices will be caught in the pan. (See the notes below if you only have a more traditional roasting pan.)
- Remove the turkey from the freezer and cut off the wrapper. Do not try to season the bird at this point.
- Transfer the turkey to the rack and place in the oven, uncovered.
- Bake at 325 degrees, allowing for the estimated cook time. Allow the turkey to roast undisturbed for 2 ½ hours. The turkey should be starting to brown and in checking the breast and thigh temperature you should be getting something around the 100 degree mark or slightly above. This will give you an idea if your bird is cooking faster or slower than estimated times.
- At this point you may choose to tip the turkey to let the juices accumulated in cavity to run out. You may choose to see if you can remove giblets from the neck or cavity. I didn't do either of these since I didn't want to wrestle with a hot bird. I am not sure there is any advantage to it.
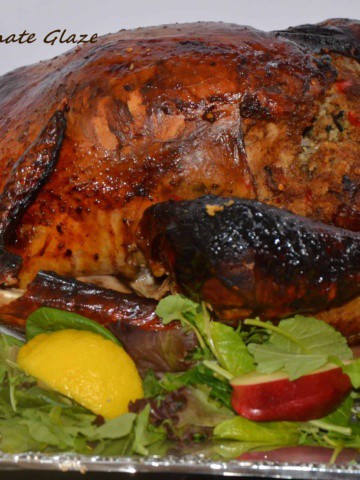
- You can also season the bird with butter, salt and pepper at this point if you like. I forewent the seasoning and chose to add a Fig, Balsamic, Orange Glaze a couple of times during the last 30 minutes or so of roasting.
- Check your turkey periodically during the remaining cooking time in case you want to cover it loosely with foil to limit browning of the breast. 30 minutes from the lowest recommended cook time, check internal temperatures again and every 20 minutes thereafter to monitor for doneness.
- When the breast meat reads 160 degrees and thighs 180, remove the turkey from the oven. You will need to tent it loosely with foil and allow it to rest at least 30 minutes to allow juices to redistribute. You may want to transfer it to a baking pan (with low sides to catch juices) to rest if you want to start making gravy with the pan juices. In that case you will want to tilt the turkey using a large spoon or spatula to allow juices to run out of the cavity.
- You will want to tilt the turkey to allow all accumulated juices to run out before you start carving or plate the turkey on its serving platter.
Note: If you have to use a more traditional roasting pan with deep sides you can still do this. Hopefully you have a rack to keep the turkey up off the bottom of the pan. You will want to cover the roaster for the first 2 ½ hours to trap the heat uniformly. Be sure to check the temperature at the 2 ½ hour point. You should rotate the roasting pan front to back for sure at this point as well. You can remove the cover to start browning the skin. Keep monitoring the thigh and breast temperature.
How to Cook a Partially Frozen Turkey
The steps are the same for a partially frozen turkey except that a partially thawed bird will cook faster than a fully frozen one. Depending on how thawed your bird is you may be able to remove the giblets and still stuff it or season it. Just follow the low and slow 325 degree oven timetable. Check the thigh, breast and stuffing temperature after 2 hours. Continue to monitor every 20-30 minutes until desired temperature is reached to avoid over-cooking.
A Note on Cavity Juices
There will be a significant amount of juices released during the cooking. Don't worry the meat will still be moist as long as you don't over cook it. Think about the water released when you defrost meat before cooking. You will want to tip the bird at some point and get those juices into your pan juices. You don't want them running out on your serving platter.
My cavity juices were a dark pink which cause me some concern even though my temperature readings were slightly above the minimum recommended. Upon further research (thanks Linda!!) it turns out this is tyypical of a Young Turkey. Sure enough my wrapper even said Young Turkey!
Coloured liquid can be caused by a protein myoglobin, which is the protein that gives meat its colour and the source of dietary iron. Myoglobin is stored within the muscles and mixes with water in the turkey, resulting in the pink fluid. Dark meat carries extra oxygen in the muscles and that's why they take longer to get tender and there may be red juice. It is not blood but just the reaction of the protein, myoglobin with the excess oxygen in the dark meat, which when cooked produces the red juice. As long as your meat in the breast and thigh has reached 165 degrees the liquid is not unsafe (but it can be unsightly). The pinkness wouldn't go away until the meat gets up in the 180 degree range - by which time the meat is over done.
Note: this applies to young turkeys and is not an issue with not-young-turkeys.
Pros of Cooking a Turkey From Frozen
- This method is so easy!
- The turkey meat, especially the breast remains moist.
- It is a FANTASTIC way to cook a turkey ahead of time with no muss no fuss. The meat is so moist you can carve the turkey and reheat gently with some pan juices the following day and it is delicious.
- This is a great way to prepare your turkey ahead of time if you are planning on serving a large group and want to get some of the work done before the big day.
- This is an easy, great way for beginners to cook a delicious turkey -but you need to invest in the thermometer!
- I actually cooked my turkey, sliced and froze the meat with some pan juices; picked my carcass; made my gravy to freeze; saved some pan juices to use in my dressing; made Turkey Pot Pies (from fresh not leftover turkey); made stock with carcass. On serving day I gently reheated the turkey and gravy, while the dressing baked in the oven with my feet up and a glass of wine!!! See below for make ahead dressing and gravy options.
- If you choose this method to make your turkey ahead of time - you can work with the pan juices for your gravy or to moisten your dressing ahead of time. You can also clean your carcass and use it for stock or get rid of it before serving times.
- I glazed the turkey during the last 30 minutes of roasting which flavoured the turkey and the pan juices.
- I honestly did not find any reduction in quality or taste from other cooking methods.
- Cooking from frozen is far safer food-wise than thawing a bird on your counter. There can be a last minute effort to take the bird from the fridge after days of thawing to find it is still partially frozen and then you are looking at cold water sink time or counter time.
- If you had planned on the more traditional roasting-from-thawed-approach but wake up the morning of 'dinner day' and your turkey is not completely thawed you don't need to panic. I have had panic stricken mornings where the turkey was bathing in cold water in my sink using up prime real estate that I needed for all the other dishes being prepared. You can use the low and slow method and just adjust to your situation. You may be able to remove the giblets or even stuff the bird depending on how thawed your bird is or not. You will just need to monitor your cooking temperatures closely to know when it is done. You will need to start a bit earlier than you had planned on.
Cons of Cooking a Turkey From Frozen
- If you are a fan of brining or seasoning under the breast or deep frying - this method is not for you. Seasoning opportunity is limited to the latter part of cooking time.
- This method does not lend itself to stuffing the bird with your own dressing recipe. However you could consider making a dressing outside the bird , like this Brioche Stuffing with Honey Garlic Sausage.
- Presentation on the day of roasting can be a bit cumbersome. You will need to tip the bird to drain the juices from the cavity and remove the giblets before transferring the bird to the serving platter. If you are going for the full-turkey-on-the-serving-platter-at-the-table approach this may be a bit cumbersome but is certainly do-able.
Related Recipes

Cooking A Frozen Turkey
If you tried this, or any other recipe on my website, please leave a 🌟 star rating and let me know it went in the 📝 comments below!
Save Print Pin FacebookEquipment
- 1 low sided roasted pan preferred
- 1 roasting rack preferred
- 1 Instant read thermometer strongly suggested
Ingredients
- 13 1lb turkey refer to the chart in the notes for roasting time on other sizes.
- Fig, Balsamic, Orange Glaze or basting/glaze of your choice
Instructions
- Preheat oven to 325 ℉.
- Place a rack in or on a low sided roasting pan.
- Remove the turkey from the freezer. Cut the wrapper off. Do no attempt to season the turkey at this point.-Don't worry about the gizzards inside. The paper is food safe and will not affect your cooking. -If your turkey is pre-stuffed there is no action required at this point but refer to the temperature chart in the Notes for doneness.
- Position the turkey on the rack in or over the roasting pan such that all the juices will be caught in the pan. (See Note 1 if you have to use a more traditional roasting pan with deep sides.)
- Allow the turkey to roast undisturbed for 2 ½ hours. The turkey should be starting to brown lightly. Check the breast meat temperature. It should be around the 100 degree mark. This will give you and idea if your bird is cooking toward the low or high end of the estimated time.
- Optional: You may choose to tip the bird and allow the cavity juices to drain out. You may also choose to remove the giblet packet at this point. Neither are necessary. You may also choose to season the bird's skin at this point.
- Check the breast and thigh temperature 30 minutes before the lowest suggested cooking time. You may choose to lightly cover the bird with foil if it is browning too much. If you are using a Glaze plan to baste the turkey with it a couple of times from here on in. Check the internal temperatures every 20 minutes from here on until the breast reaches 160℉ and thighs reach 180℉. If your bird was a stuffed one, the stuffing should read 165℉. Insert thermometer deep in to the cavity to get a proper read. See Note 2.
- When the turkey has reached the correct temperatures, remove from the oven. Tilt the bird in the roasting pan to drain all cavity juices. Remove giblet packet with a fork or tongs if you haven't already. Transfer the bird to a platter and tent loosely with foil. Allow the turkey to rest 30 minutes to allow the juices to redistribute.
- You can use the pan juices to start making gravy while the bird rests. See Note 3 for Gravy suggestion.
- Tilt the turkey when the tenting period is done to drain any other juices that may accumulated.Carve and plate the turkey or transfer it to a serving platter if carving at the table.


Leave a Reply