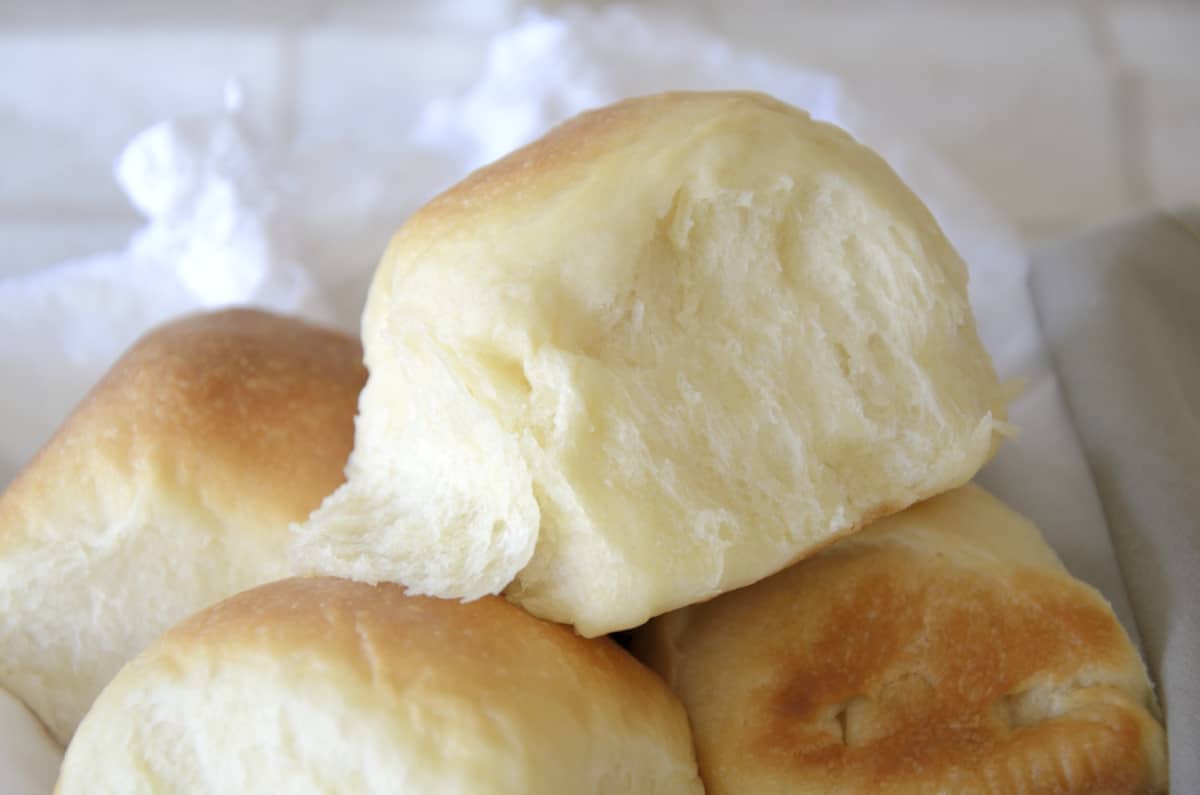
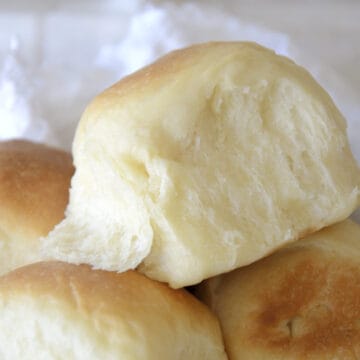
These Bread Machine Sweetened Condensed Milk Dinner Rolls are the softest, fluffiest rolls I have ever had!
(Note manual kneading instructions are included in the recipe card.)
Apparently soft and fluffy is a hallmark of Asian rolls but these will be a hit with any type of cuisine. Milk helps give bread a soft crumb and the addition of sweetened condensed milk makes for an even softer, fluffier roll.
Jump to:
What Are Sweetened Condensed Milk Rolls?
They are pretty much what they sound like. It is a dough recipe much like any other yeast dough but the milk makes the dough soft and the sweetened condensed milk makes an even softer, sweeter dough than even traditional milk bread recipes. Having said that they are not overtly sweet; they go well with a savoury soup or filling.
The Japanese get credit for the origins of milk bread. It involves a method called Tangzhong where you make a warm roux to start. This allows the gluten to develop before you add the milk and the remaining ingredients. It is also shaped by forming three dough balls in a bread pan to rise which results in a distinctive segmented pattern after baking.
These Sweetened Condensed Milk Dinner Rolls are like milk bread on steroids for softness and sweetness! And - they are much easier to make in your bread machine! In fact - you get all the classic softness and fluffiness without any additional work on your part. The ingredients are doing the work for you here!
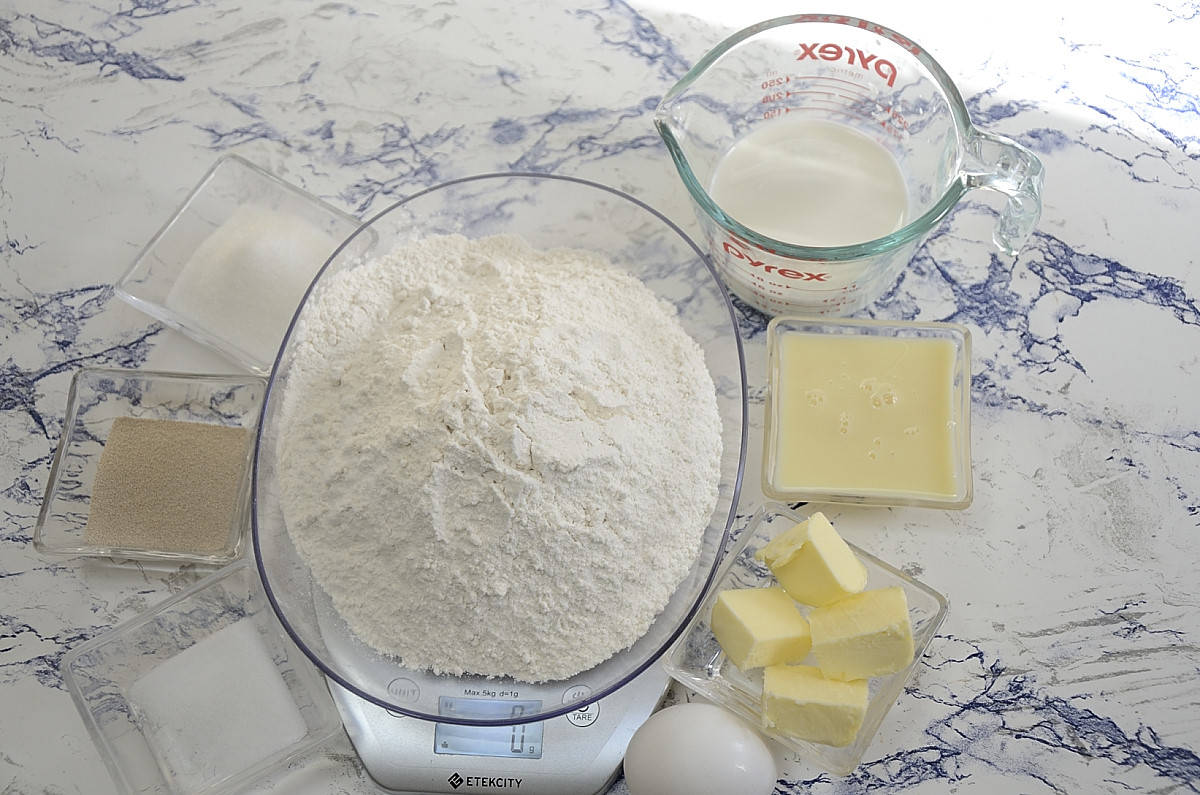
Ingedients
Butter- unsalted is best. If salted butter is all you have you can use it but reduce salt in the recipe to ¾ tsp.
Egg- the recipe calls for a large egg. Only have small or medium? Go ahead- the difference will be negligible.
Milk- the recipe calls for whole milk which is recommended because this is what contributes to the soft, fluffiness of the bread crumb. You can use 2 % or Skim but your rolls will be less soft and light.
Sweetened Condensed Milk - This ingredient is key to the recipe. There is no substitute.
Flour - the recipe calls for all purpose flour and that is recommended. You can use bread flour but again your crumb will not be as soft and light as it will be with all purpose.
Sugar- is regular sugar. Fine grind or regular is ok. Do not use powdered sugar.
Salt - regular table/sea salt is what is called for. If you used salted butter instead of unsalted reduce salt to ¾ tsp.
Yeast - the recipe calls for Rapid Rise yeast. Bread machine yeast, fast acting yeast are all ok. See Fleischmann Yeast's Guide for yeast equivalents. Active yeast does not work well in a bread machine because it needs to be dissolved in water to activate it.
How To Make Bread Machine Sweetened Condensed Milk Rolls
These rolls are soooo soft and moist. We are going to use the dough cycle of the bread machine and then shape the buns by hand and bake in a conventional over. (Note that manual kneading instructions are included in the recipe card so don't despair if you don't have a bread machine.)
How Long Does It Take To Make These Rolls?
It takes about 2 hours and 45 minutes total. So you have to be around your kitchen. But the good news is you only spend about 15 minutes hands on in total. The bread machine dough cycle takes about an hour and a half for the first rise and the second rise takes about 35 minutes. Baking is another 25 and some time to cool.
Instructions
Gather your ingredients.
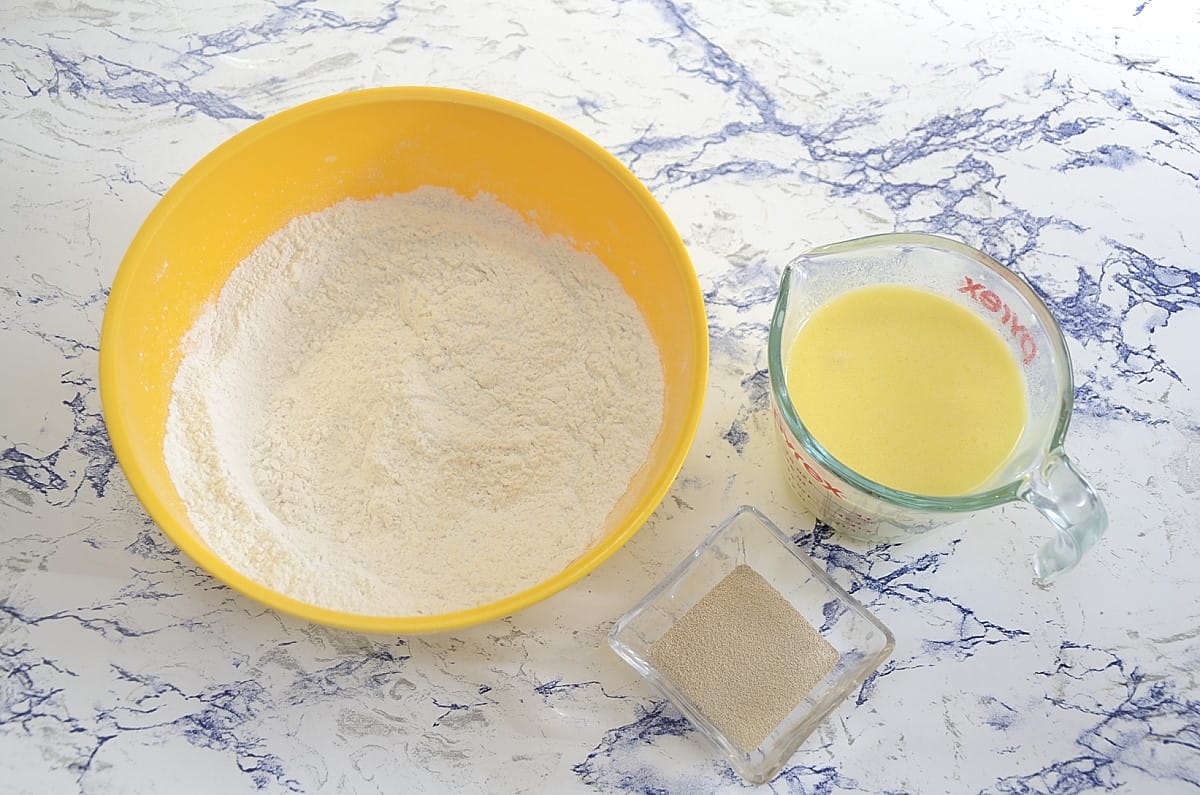
Measure out the flour, sugar and salt. A kitchen scale is highly recommended for baking since flour can compact and dry measuring is not really very accurate. Having said that if you don't have a scale be sure to stir your flour up to loosen it and then spoon or scoop the flour in to your final measuring vessel. Mix flour, sugar and salt together.
Measure out the yeast.
Then warm the milk and melt the butter. Whisk the egg and sweetened condensed milk in to the milk and butter.
Tip: You will have sweetened condensed milk left over after making these buns so consider making White Chocolate Snowball Cookies. Or make more batches of buns and freeze them!
Add the ingredients to your bread machine in the order recommended. Mine is liquid on the bottom, then flour mixture, then the yeast.
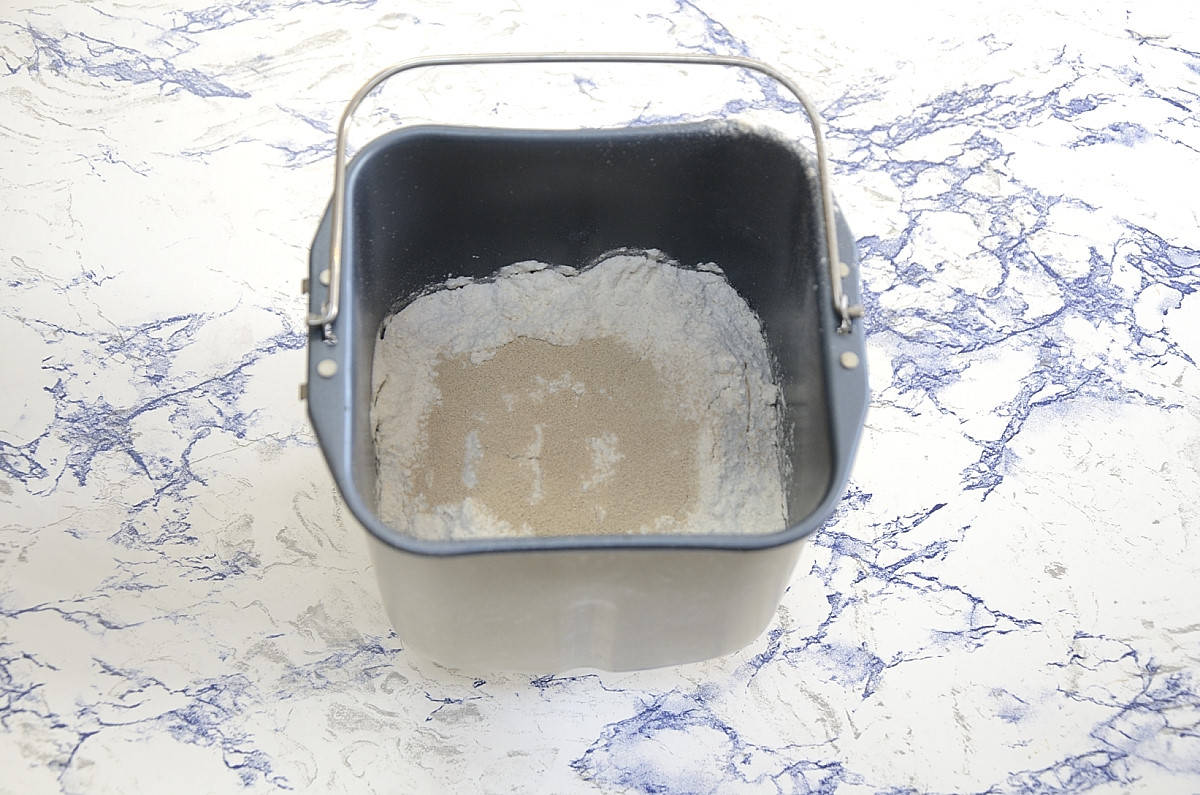
Set your machine to the dough cycle. Make sure your container and paddle are firmly in place.
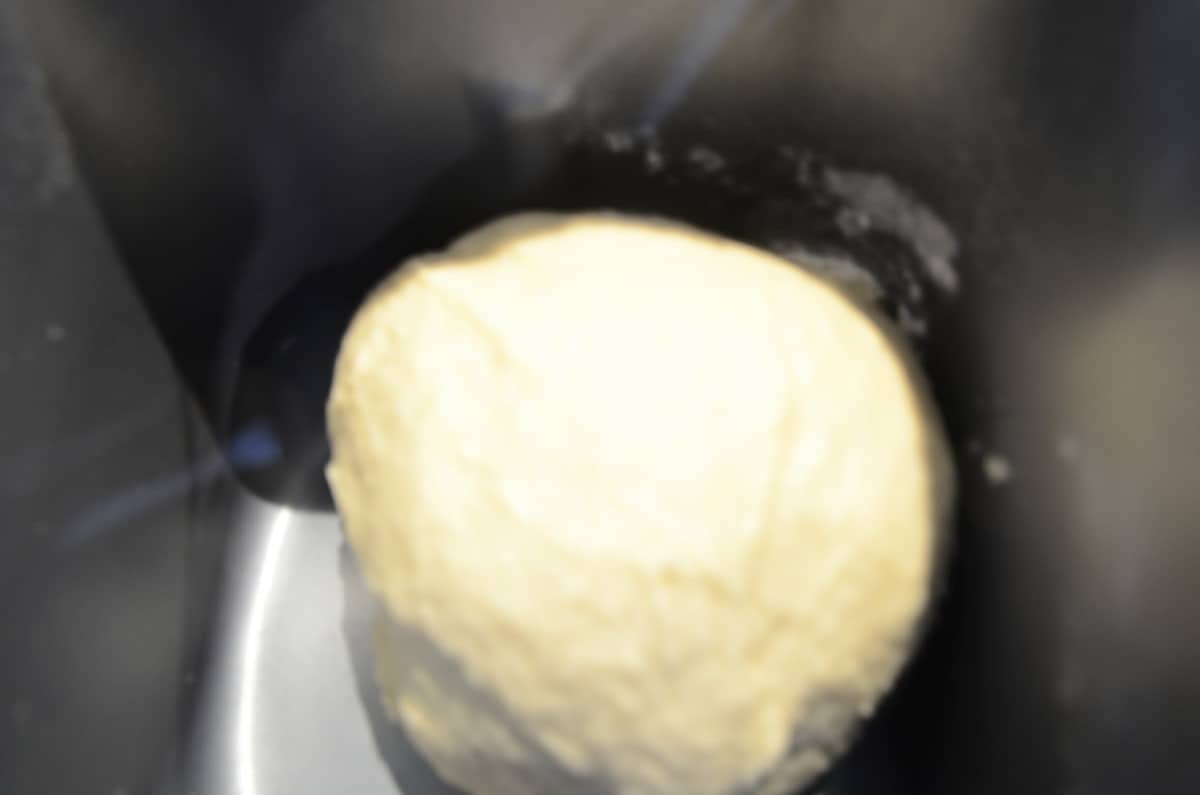
Check your dough about 15 minutes in to the dough cycle. The picure below is a bit fuzzy because the paddle was moving. But you can see a fairly smooth elastic looking skin on the dough. The dough should be forming a nice size ball around the center of the machine. If the ball is really small and tight it might need a tablespoon of water. If it is really shiny and wet and loose, not in a nice ball, it needs more flour. Either way add a tablespoon at a time and watch when the kneading resumes. Give it a minute or so to incorporate and decide if you need to add a tablespoon more. BTW... this is not a big issue if you weighed your flour. The flour to water ratio should be about right.
Allow the dough cycle to finish.
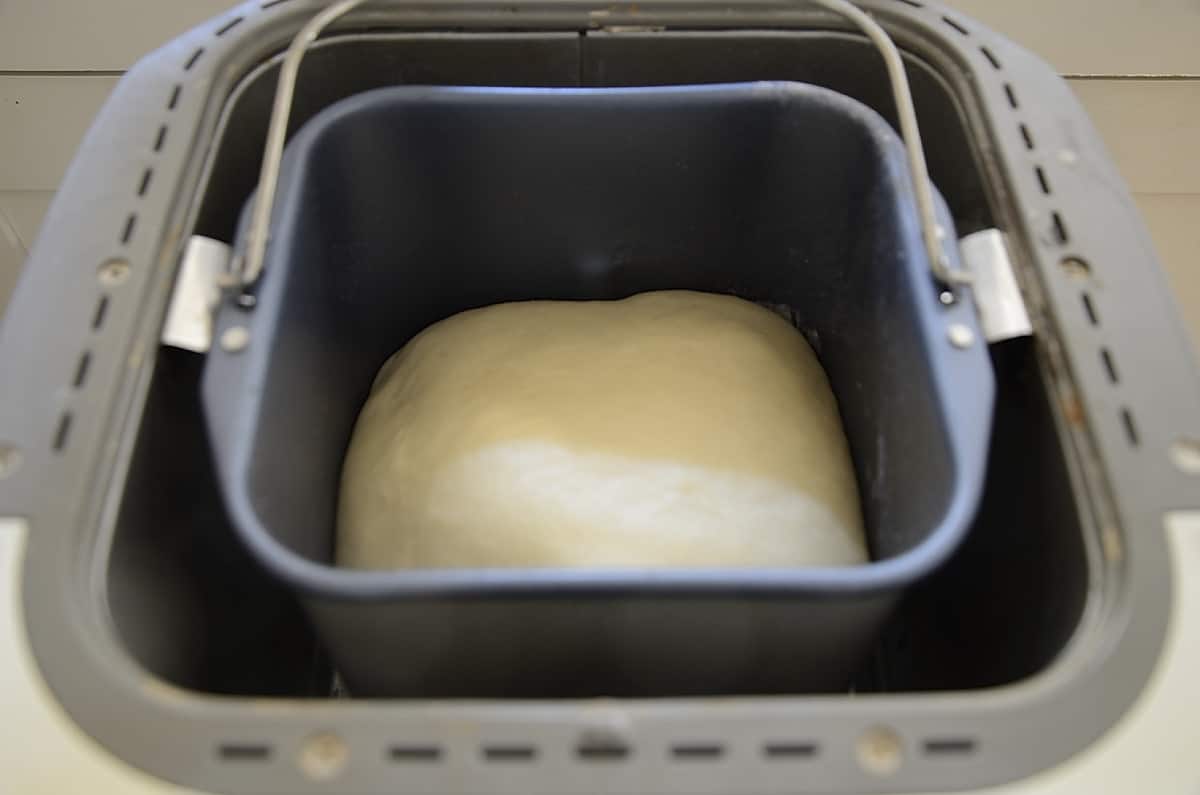
When the dough is ready, oil your hands and transfer the dough to a work surface. Punch it down to deflate it. Fold it over on to itself in thirds and form a thick log.
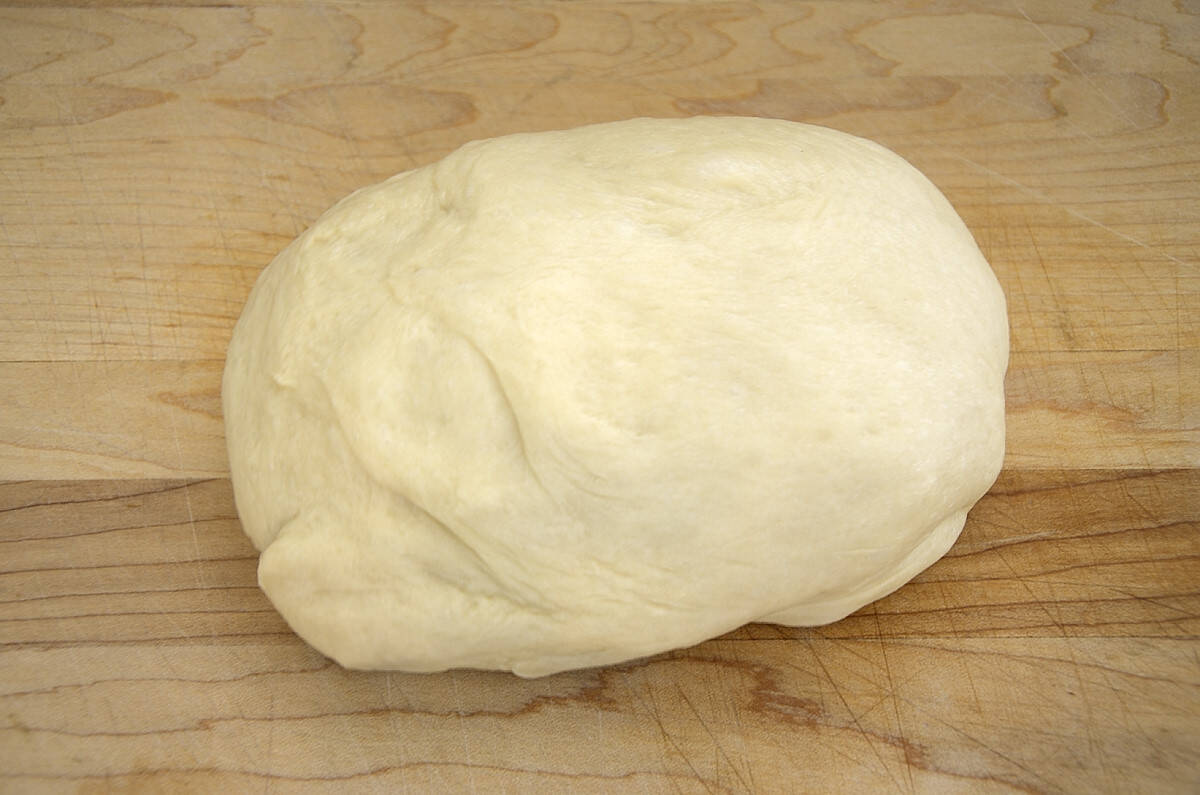
You are going to cut the log in to thirds.
Tip: I often measure the complete dough ball and then the thirds as I cut them so I get evenly sized dough balls.
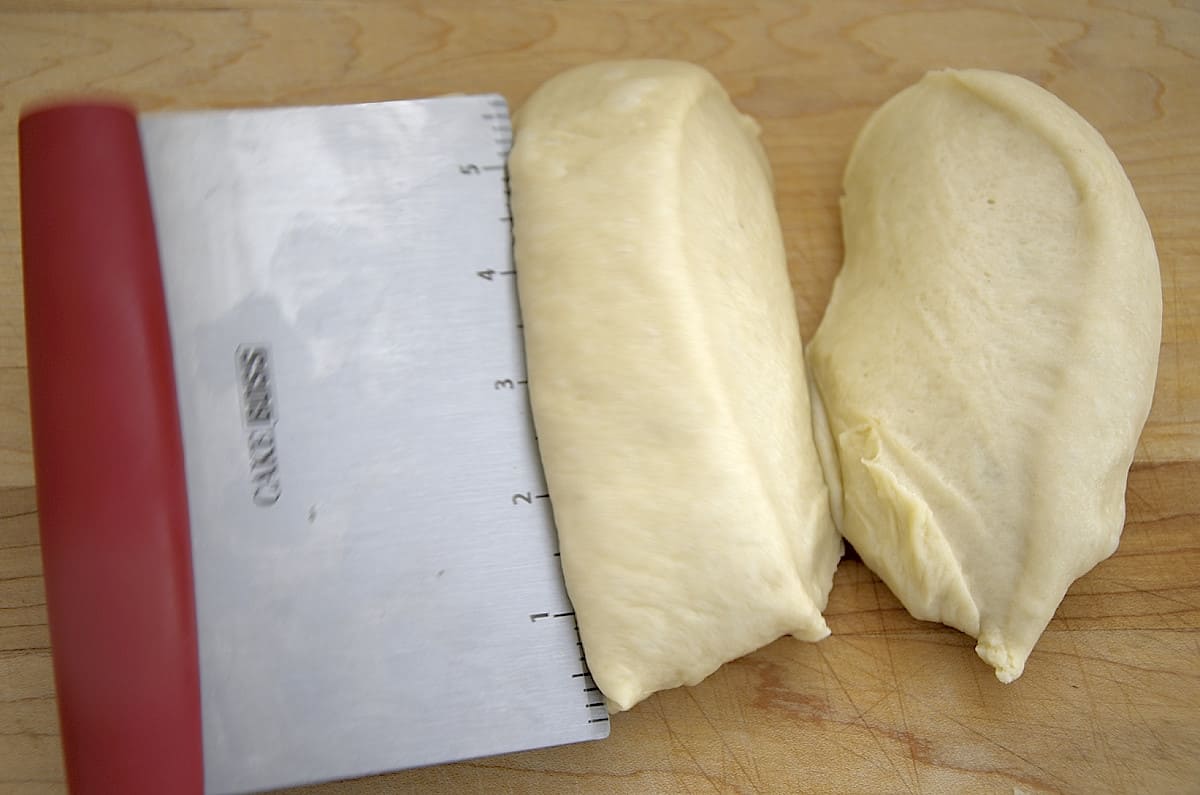
Cut each third in to 3 balls again. You will have 9 dough balls. (This is where weighing the dough balls helps to get evenly sized buns. But some people are way better at eyeballing this kind of thing than I am!)
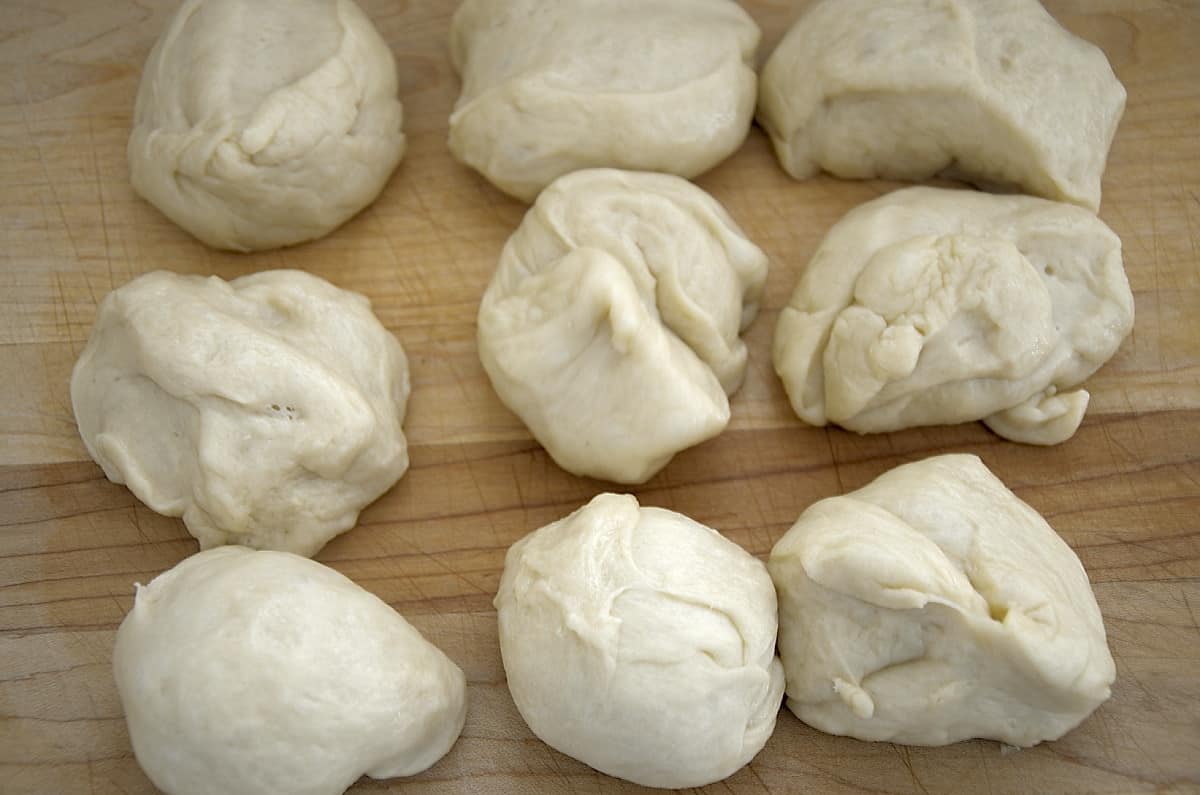
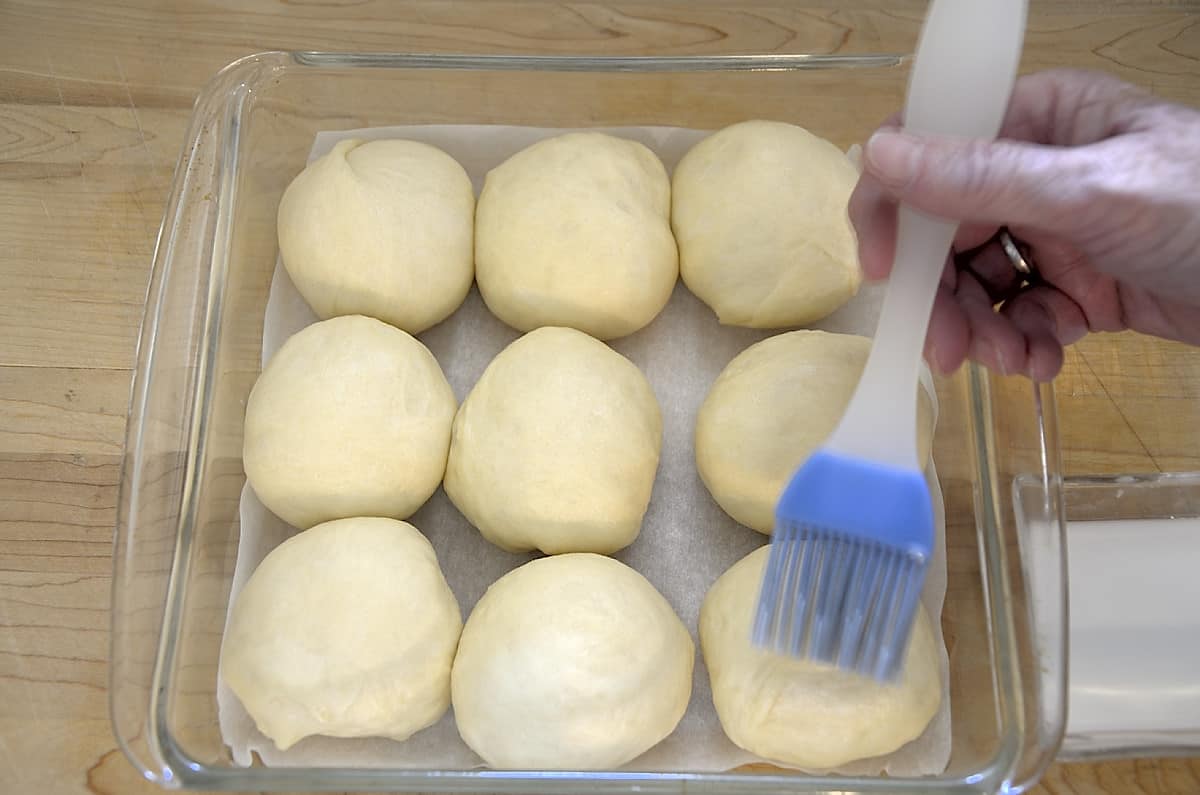
Smooth the top surface of each dough ball by pulling the outer edges underneath the ball. Twist the edges you have pulled down and tuck them up in to the center of the dough ball.
Line the dough balls up evenly in your baking pan.
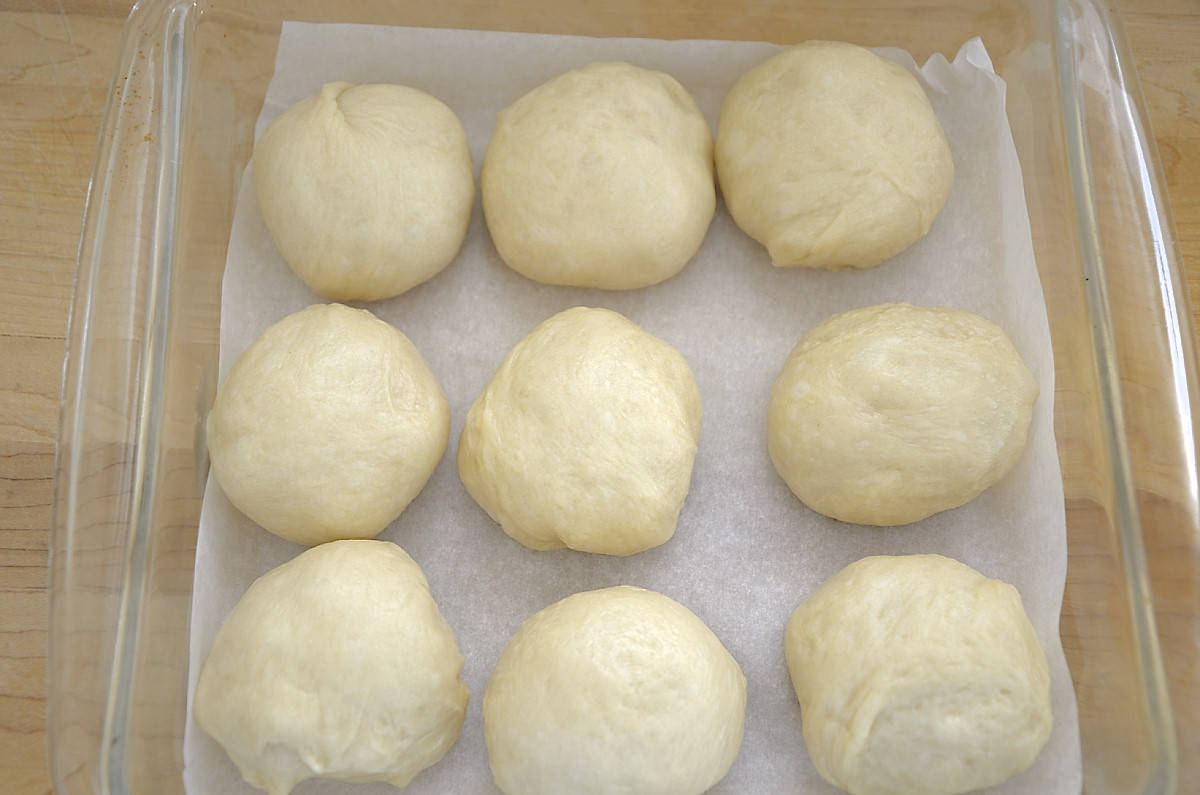
Cover and allow to rise in a warm place for about 35 minutes.
Preheat the oven to 350 degrees F while the buns are risings. Line your baking pan with parchment. Cut an extra piece of parchment paper to cover the buns while baking.
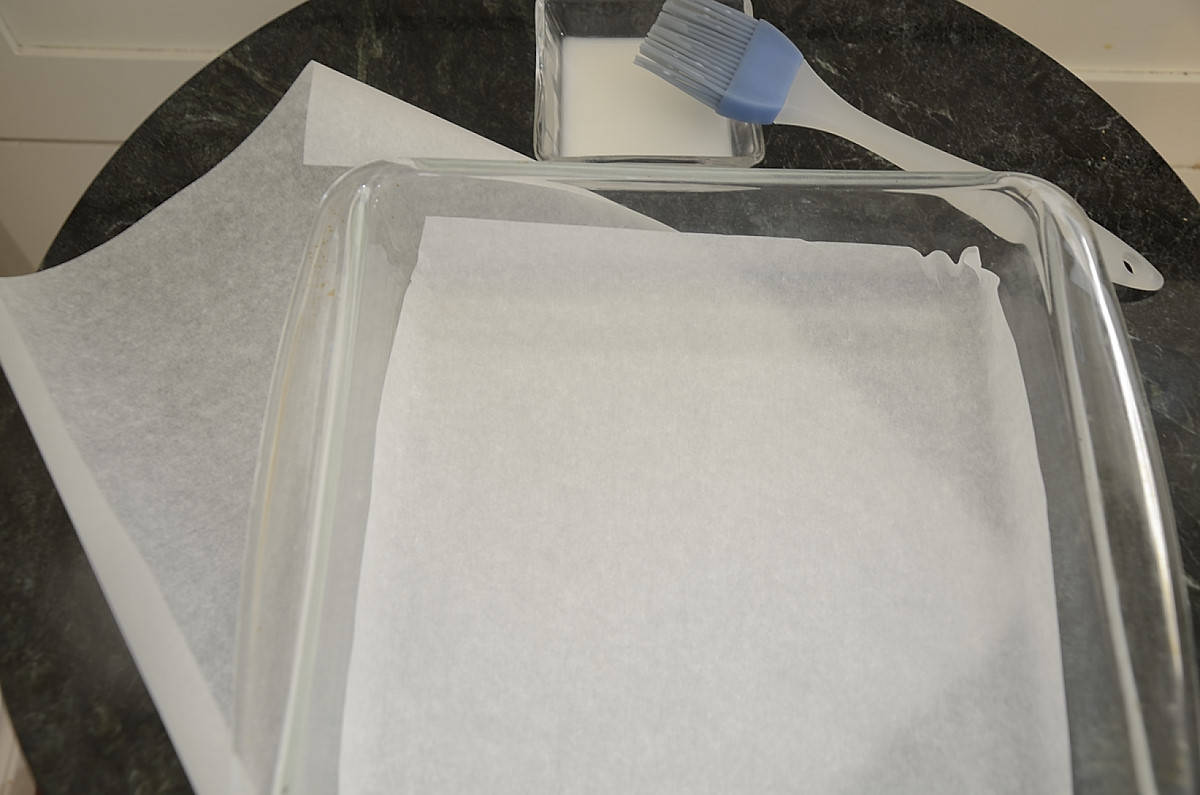
When buns have finished their second rise, brush the tops of them with milk. Transfer baking pan to the oven. Place a sheet of parchment paper lightly over the top to prevent them from browning too much.
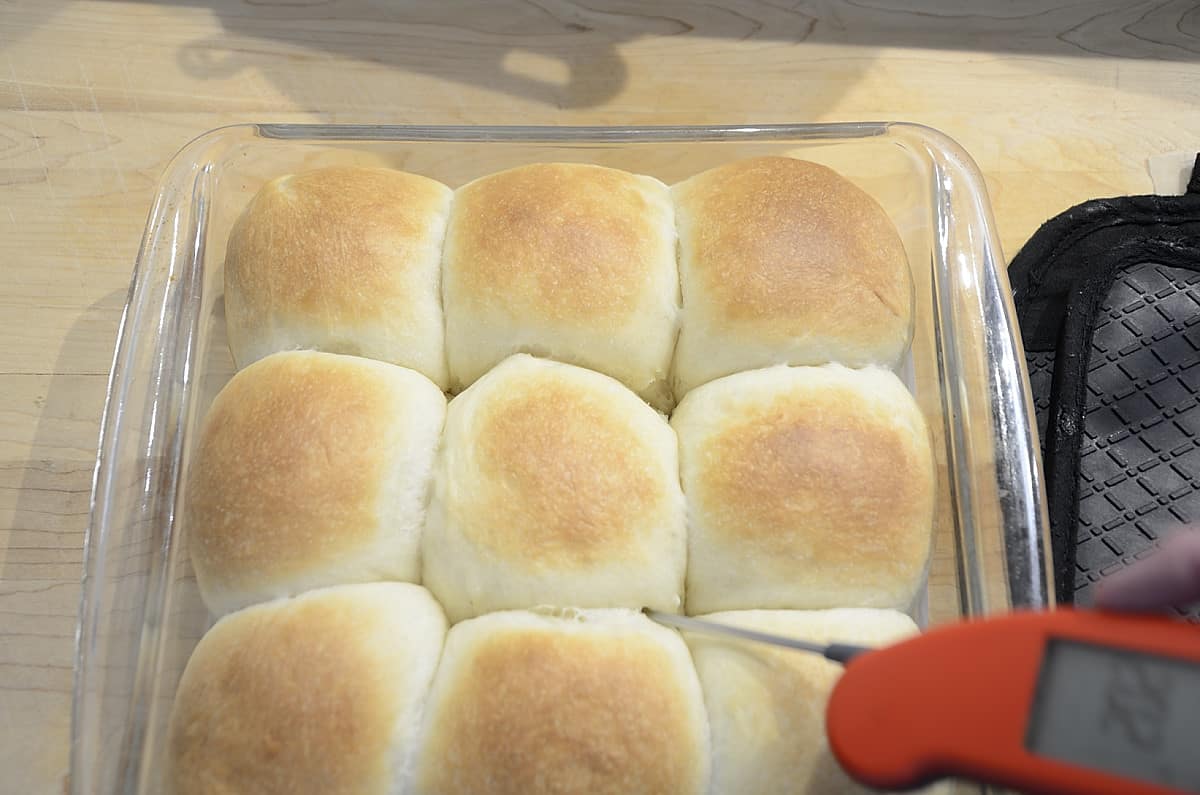
Remove the parchment after about 20 minutes and allow the buns to cook another 5 minutes or so. If you are using an instant read thermometer check for 190 degrees internal temperature. As you can see in the picture, mine read 202 degrees which was fine. The buns are quite forgiving of a bit higher temperature but lower than 190 and you risk an uncooked center.
When done, allow buns to cool 10-15 minutes, then remove them from the pan and allow them to continue to cool.
Separate buns when ready to serve.
FAQs
Since there are no preservatives in homemade buns they are best the day they are made. Freeze any leftovers or buns you know you won't use immediately, once fully cooled. You may keep leftovers tightly sealed on the counter overnight but you will notice they are not quite as good as the first day.
Yes. Bread machine yeast, instant yeast and rapid rise yeast are all interchangeable according to Fleischmann's Yeast. Active yeast needs to be dissolved in liquid to activate it so it doesn't work well in a bread machine.
Yes. Instructions for manually kneading the dough are included in the recipe card.
No. They are two different products. The recipe requires sweetened condensed milk.
Yes you can and it is recommended that you freeze any buns you don't eat on the first day. There are no preservatives in these homemade buns. You can keep them sealed airtight on the counter but you will notice the 2nd day they are not as soft and light. Best freeze any extra buns as soon as they are completely cooled. When ready to use just defrost. You might choose to lighty warm them but that is optional.
These rolls are delicious with butter on their own! You can put jam or peanut butter on them. I have served them with Pulled Pork or with leftover turkey and cranberry sauce. They go well as a side with soups and salads as well.
Bread Machine Sweetened Condensed Milk Dinner Rolls
If you tried this, or any other recipe on my website, please leave a 🌟 star rating and let me know it went in the 📝 comments below!
Save Print Pin FacebookEquipment
- Bread Machine
Ingredients
- 4 Tbsps unsalted butter melted See Note 1.
- 1 large egg
- 140 ml whole milk ½ cup plus extra for brushing top of rolls
- 80 grams sweetened condensed milk ¼ cup
- 300 grams all purpose flour 2 ½ cups
- 30 grams sugar 2 ½ Tbsps
- 5 grams salt 1 tsp
- 7 grams Rapid Rise yeast 2 teaspoons See Note 2.
Instructions
- Melt butter in microwave. Warm milk in microwave-about 1 minute on medium.
- Whisk melted butter, egg, milk and sweetened condensed milk together until well mixed.
- Combine flour, sugar and salt in a bowl and mix well.
- Add ingredients to your bread machine in order suggested by manufacturer. Mine is liquids, dry ingredients and yeast on top.
- Set bread machine to dough cycle. (See notes below for manual kneading/rise).
- Prepare a baking pan about 8 X 8" or 9 X 9" with parchment paper on the bottom and slightly up the sides. Alternatively oil baking dish slightly.
- Lightly oil your work surface and your hands. When the dough cycle is finished remove dough to work surface and punch it down. Fold it over on itself and form a fat log.
- Divide dough into 3 equal portions and then divided each third into 3 more equal portions.
- Shape the dough by stretching the top surface into a round smooth top. Twist and tuck the ends into the bottom of the dough ball. Transfer the dough to the baking pan spaced evenly apart in 3 X 3 rows. Cover the baking pan with plastic wrap and allow dough to rise for about 35 minutes.
- Preheat oven to 350°. Do NOT use convection here because you are going to cover the buns with parchment paper so they don't get too brown. Convection fans will blow the paper off.
- Brush the tops of the rolls with milk. Place a sheet of parchment paper lightly over the top of the buns.
- Bake the rolls for about 20 minute. Remove parchment paper and bake rolls 5 minutes more. You can test for doneness with an instant read thermometer. Middle roll should read 190°.
- Remove from oven and allow rolls to cool for 5-10 minutes. Remove rolls from the pan and allow to cool further. When warm or room temperature pull or cut rolls apart.
- Serve warm or at room temperature.
- Rolls are best the day they are made but will keep another day in an airtight container at room temperature. If you want to keep them longer than the 2nd day freeze in an airtight bag.
- Allow frozen rolls to thaw at room temperature and warm slightly in microwave if desired just before serving.
Notes
- Mix all the dry ingredients in a bowl, including the yeast.
- Mix the wet ingredients (except the butter.)
- Using a stand mixer with a dough hook on low or wooden spoon- add the wet ingredients to the dry ingredients until consistently wet. This will only take a minute or two with a mixer and a bit longer by hand. Take a spatula and ensure all the dry flour on the sides of the bowl gets incorporated.
- Increase the mixer speed to med/low and add the butter bit by bit in cubes until it is smoothly incorporated and the dough is smooth. This will take a couple more minutes with the mixer and a bit longer by hand. The dough will be sticky and moist.
- Transfer the dough to an oiled bowl. Work it another minute or so by hand by stretching it into a ball, tucking the bottom edges in. Repeat this a few times and then position the dough seam side down. Cover and allow dough to double. This will take 1-2 hours depending on how warm your kitchen is.
- When ready, punch the dough down and continue with the recipe as written.

Vickey
Best bread rolls
Carolyn Hetke
Thanks! Aren't they delicious??
Suzanne Abbitt
I tried to double your recipe to 18 rolls. The flour still said 2 and a half cups. Can you give me the correct recipe for 18 rolls? I would love to make these for our Christmas dinner.
I used the 9 roll recipe and they turned out great, although I did use regular jar yeast and proofed it first.
Thank you so much!
Carolyn Hetke
Hi Suzanne, I am glad you noticed this. When you adjust the recipe only the first quantities in grams adjust. The cups and tsps etc that I added don't get picked up. Not sure I can do anything about that because that is the logic in the recipe card but I will look into it. To double the recipe use: 1/2 cup unsalted butter; 2 eggs; 1 cup milk + more for brushing; 1/2 cup sweetened condensed milk; 5 cups flour, 5 Tbsp sugar; 2 tsp salt; 4 tsp yeast. If you are using your bread machine you may want to check it as the dough is rising in case it breaches the lid. You may need to finish the rise outside the machine in a bowl, in a warm place. Hope everyone enjoys them at Christmas!
ChrisB
These dinner rolls are the best - even the next day!
thewineloverskitchen
Thanks Chris...yes.. occasionally they last until the next day! LOL!
ralph hetke
love the texture and the salt taste
they are wonderful when warm with butter
to eat with a favourite soup
Susan Warren
The best ever!
Holli Gonzalez
Can I double the recipe in my breadmaker? It makes a 2lb loaf of bread
thewineloverskitchen
I think you could. You are taking the dough out after the first rise so it might hit the lid but I think it would be ok.
David Guith
Always shy away from recopies where the order of ingredients doesn't match the verbiage. Worse, directions for the dough without a picture. Pass!
thewineloverskitchen
Good point. I corrected the order of ingredients listed. I too find that frustrating so happy to improve. Can't help with the dough photo at this point. Thanks for the feedback.
Samantha
I've been making bread for a long time now for not only my family but for other people and this is by far the best recipe now nobody wants any other bread for me but this it is delicious soft and fluffy.
to the person that made this negative comment if you don't know the order at which your ingredients should go in your bread maker then I would throw at your poor bread maker it is pretty standard and for somebody who just has a comment didn't even make the bread but just has negativity to say keep your comments to yourself. If you don't like the bread after you make it then you can say something but until then get a life.
I think the person who supplied this bread Recipe it's amazing but maybe I shouldn't thank you because now this is the only bread anybody wants LOL
Carolyn Hetke
It is kinda addictve!!
Judy
Hi Carolyn. Could you take these rolls once they are shaped and freeze them then when you want one, two, etc take them out of the freezer and let them sit overnight on your counter (for the extra rise) and bake them then?
thewineloverskitchen
Hi Judy. In theory you could so as you say but I have never had good luck with that approach. I find my rolls or bread doesn't get as light and fluffy this way. The risk I think would be in over proofing the second time. If the dough thaws within a few hours and then has a few more hours to rise the buns might over proof. I have not tried it with these rolls but my instinct would be to thaw the dough overnight in the fridge and then allow a half hour or so to come to room temperature and another 35 minutes to proof. (Covered the whole time.)
If you decide to try it please let me know who it works out!
Lisa
Can I make these if I don’t own a bread machine?
Thanks!
thewineloverskitchen
Hi Lisa. I updated the instructions to explain how to make the rolls without a bread machine.
River
Can you do bread loaves with this recipe?
thewineloverskitchen
I have never tried it but a couple of things come to mind. Dough for buns is softer than bread because of the additional ingredients. I suspect the loaf would not rise as well as a normal loaf. I am just going by bread has fairly visible air pockets and buns are much finer. You could try it but you would also have to increase the bake time to be more like time for a loaf of bread. If you try it let us know how it turns out!