This delicious German Bee Sting Cake is so easy to make I decided to spend a bit of extra time on the icing to take it up a notch for a special occasion.
I made 2 changes to the German Bee Sting Cake I first published.
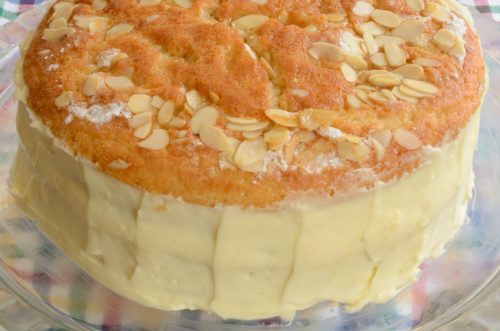
I changed up the icing to make more of it and make it stiffer and I added some additional toasted almond slices to the top of the cake at the icing stage. The original is still delicious and quick and easy too!
The additional toasted almonds lend a surprising nuttiness, perhaps because the vanilla flavours of the cake and icing allow them to really shine! As a matter of fact -they were to die for. There are so few competing flavours in this cake that it allows the vanilla, the honey and the almond flavours to shine through.
Such simple flavours that combine to make something great!
I used a Wilton 2D tip for the icing florettes. It is quite a bit bigger than even the tip 21 which is called large. The size is not critical, if you use a smaller tip you will just have more florettes and more rows.
Adding a circle of florettes on the top of the cake makes a bit of a 'corral' to hold the additional toasted almond slices. It also amps up the presentation a bit.
I made this as birthday cake. You could potentially make some icing florets to hold the birthday candles.
I now have a new go-to celebration cake. The payback on the flavour and presentation vs the ease of making this really do make it an outstanding recipe in my opinion. Okay - 'nuff said!
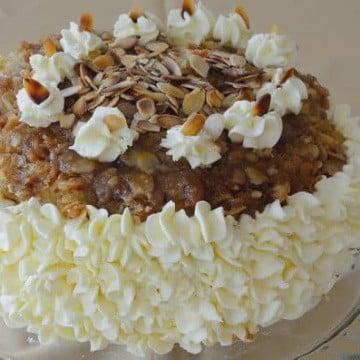
German Bee Sting Cake II (Bienenstich)
Ingredients
Cake
- 1 French vanilla cake mix or similar neutral flavour
Topping
- ½ cup honey
- 6 Tbsps unsalted butter
- 1 teaspoon vanilla
- ¾ cup almond slices divided ½ + ¼
- a tablespoon of flour or so for sprinkling top of cake
Icing
- 4 cups whipping cream
- 2 4 oz instant vanilla pudding mixes
Instructions
- Preheat oven according to cake mix instructions.
- Melt butter for topping in a non-stick saucepan over medium/low heat. Add honey and bring to a boil. Simmer for 2 minutes, remove from heat and add vanilla and ½ cup of the almond slices. Allow to cool.
- Line 2 - 8" round cake pans or 1 - 10" spring form pan with parchment paper. Prepare cake mix according to instructions.
- Pour cake batter into your cake pan(s). Sprinkle top of 1 pan with a tablespoon of flour or so. Gently pour/spread honey almond topping over top of 1 pan.
- Bake according to manufacturers instructions for your cake pan size.
- Remove cake from oven when toothpick comes out clean. Spread the remaining ¼ cup of almonds evenly in a flat oven proof pan. Toast in the oven about 7-9 minutes until lightly browned. Check and stir to ensure they don't burn. Allow almonds to cool.
- Allow cake to cool about 20 minutes. If using 1 pan, remove cake from pan and slice horizontally in half. If using 2 pans remove bottom of cake from pan and remove parchment paper. Transfer cake bottom to serving platter.
- To prepare the filling beat whipping cream until it forms stiff. Beat in pudding mix and continue beating until it is stiff.
- Spread about ⅓ of the filling over the bottom layer of the cake. Position the top layer on the bottom layer and filling with the almond topping side up.
- Using a large star pastry tip ( I used a Wilton 2D) and a pastry bag, fill the pastry bag with icing mix. Starting at the base of the cake pipe florettes evenly around the cake. Continue building rows of florettes up the side of the cake until you reach the top.
- When you reach the top with the almond mix, pipe a round of florettes about half way from the center of the cake top. Sprinkle toasted almonds inside the round of florettes. Add an almond slice to some or all of the florettes on top if desired.
- Refrigerate until ready to serve.

ashok
Guys, Thanks For sharing this Great Recipe. My Family Loved it. I am definitely sharing this recipe and this website with my friend. Hope they also love it. Thank you again for sharing such a great recipe.
thewineloverskitchen
I am so glad you enjoyed it! I love that recipe too! and it's pretty easy to boot!
stefani
Amazing cake.
I love it.
thewineloverskitchen
I am glad you like it! It is pretty easy too!