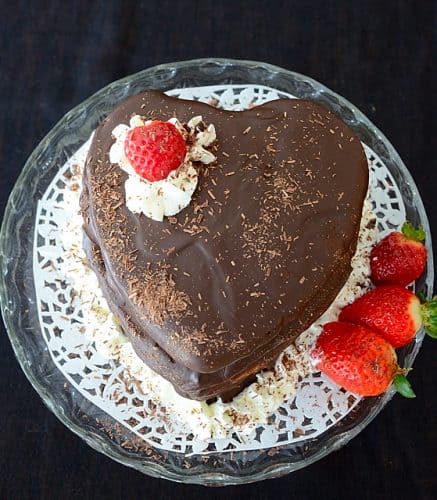
Since chocolate seems to by synonymous with Valentine's Day this Valentine's Chocolate Cake will fill the bill.
I found a set of 5 heart shaped baking pans from Wilton at Bulk Barn so I was off to the races. Stay tuned for heart cake, heart pancakes, heart omelettes...LOL!
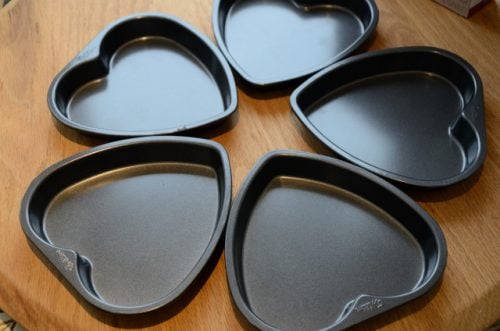
If you don't have special heart shaped pans you can use 8" layer cake pans instead. You could use up to a 10" spring form pan but your cake will not be as high.
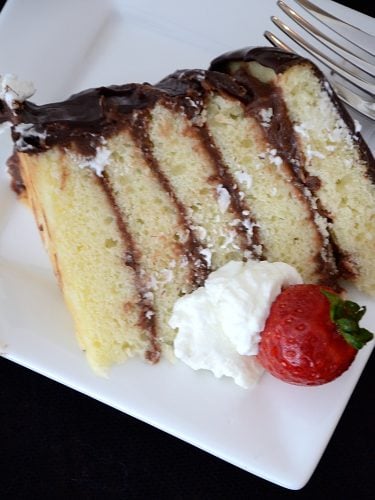
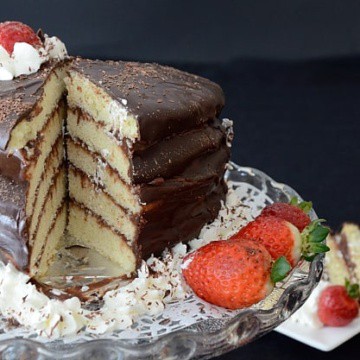
The main idea is to make multiple layers so you have lots of surfaces to spread the chocolate filling over. The filling will also soften the cake layers into a some what creamy consistency.
The final icing is melted chocolate soften with a bit of vegetable oil and optional whipped cream and/or chocolate shavings for decorations.
The homemade cake batter is a bit drier and coarser than what a cake mix would produce. The cake is actually better about 24 hours after assembly so the chocolate filling has time to do its work.
You could use a cake mix if you want to stream line the process. Follow directions on the cake mix to bake in layers.
There are 2 ways you can go about the layers. For me, with the 5 cake pans, I divided the batter into 5 equal amounts and just baked them up. If you are not using 5 similar pans it would be easiest to use 2 layer cake pans. You will have to line the pans with parchment paper so you can remove the baked cake layers and repeat until you have baked 5 layers. Or you could make 4 layers and divide the batter into 4 equal portions- and repeat baking layers until you have 4.
The other way to approach 4 layers is to bake 2 layers and when layers are cooled cut each layer in half horizontally to make 4 final layers.
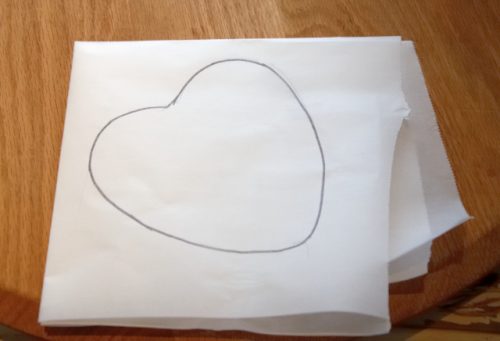
To cut out multiple parchment paper templates fold your parchment paper so you have 4 or 5 layers of paper. Trace the outline of the pan you are using and holding the papers firmly, cut them all out at once.
The recipe as written makes about 4 cups of batter. The batter is very stiff so you have to really spread it out to the outer edges of your parchment paper with a spatula. Make sure your edges do not thin out or your cake layers will tilt down when they're done. In fact -err on the side of caution so that if anything the middle is thinner than the edges. Ideally though they will be even!
When my layers were baked and cooled I made a cardboard template of my cake pan shape and covered it with foil. This way I could assemble the cake on a wire rack and move it easily to the serving plate.

I covered each of the first 4 layers with the butter cream filling. Do not put filling on the top layer or the icing won't stick.
The icing is melted chocolate soften with a bit of vegetable oil. Spoon it over the top and use an offset spatula to spread it evenly over the top layer. Allow the icing to flow over the sides and use the spatula to cover all the side.
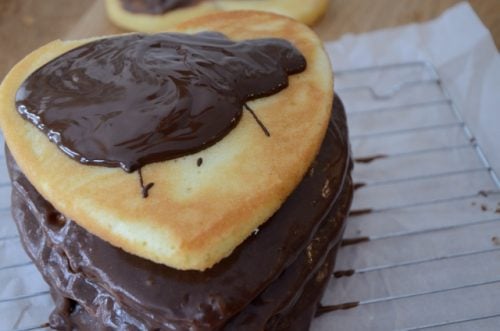
Decorate with fresh fruit, whipped cream and/or chocolate shavings.
Chef's Notes:
The recipe quantities were originally in measured weights. I have translated them to our more common cups and teaspoons but they are not rounded figures like we are used to. I have provided weight measurements as well.
Valentine's Chocolate Cake
If you tried this, or any other recipe on my website, please leave a 🌟 star rating and let me know it went in the 📝 comments below!
Save Print Pin FacebookIngredients
Cake Batter
- 250 grams unsalted butter (room temp) 1 cup + 2 Tbsps
- 250 grams sugar 1 cup + 2 Tbsps
- 1 pkg Vanillin sugar 1 teaspoon vanilla extract
- 4 eggs
- pinch of salt
- 200 grams all purpose flour 1 ⅓ cups
- 50 grams corn starch 6 Tbsps
- 1 teaspoon baking powder 1 tsp
Filling
- 113 grams Instant Chocolate Pudding 4 oz pkg
- 2 tsps cocoa 2 tsps
- 100 grams sugar ½ cup
- 1 ½ cups cold milk 1 ½ cups
- 250 grams unsalted butter (room temp) 1 cup + 2 Tbsps
Icing
- 200 grams semi-sweet chocolate 7 oz
- 2 tsps vegetable oil 2 tsp
- ½ cup whipped cream for garnish ½ cup
- chocolate shavings for garnish
Instructions
Cake
- Preheat oven to 350 degrees. Cut out the parchment paper liners for the number of layers you are making. Grease the sides of your cake pans so the baked layer will easily come out of the pan.
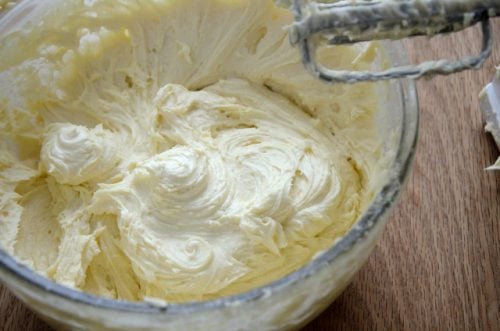
- Beat butter until cream and then add sugar, vanilla, eggs and salt.
- Mix the flour, corn starch and baking powder to the butter mixture 1 Tbsps at a time. It should take about 4 minutes of beating to add all the dry ingredients. Batter will be very thick.
- Divide the batter evenly for the number of layers you are baking. Spread batter evenly over the parchment paper templates ensure the batter does not thin out at the outer edges.
- Reduce the oven temperature to 325 degrees when you put the cake pans in. Bake 8-10 minutes if you are making 4 or 5 layers or until a toothpick comes out clean from the center. Do not let the edges get crisp and brown so check after 8 minutes.
- If you are making deeper layers that you plan to cut in half then the baking may take 25-30 minutes. Check after 25 minutes and bake until a toothpick comes out clean from the center.
- Invert baked cake layers to a wire rack to cool and gently remove parchment paper immediately.
- Repeat until you have the number of layers baked that you want.
- Cool completely before filling and icing.
Filling
- Mix the pudding powder, cocoa and sugar together. Add the milk and beat for about 4 minutes. Allow pudding mix to stand about 5 minutes to thicken.
- Beat in the butter. Mixture will be grainy. Mix it well. Then microwave the mixture on High for about 2 minutes until the butter melts into the mixture. You may have to heat a bit more depending on the power of you microwave. Do not overheat. Beat mixture after the butter has melted in until it is silky smooth.
- Chill the filling to allow it stiffen up.
Icing
- Melt chocolate gently. I set a heat proof bowl in a skillet of water over medium heat and stir until the chocolate is melted. Add the vegetable oil and mix evenly. Remove from heat.
Assembly
- Place the bottom layer of your cake on your foil template preferably over a wire rack so any excess filling or icing can drip down through the rack.
- Spread filling evenly over the first layer. Repeat with the remaining layers but do not put filling on the top layer. You may have some filling left over.
- Pour warm icing over the top layer. Smooth out with an offset spatula and let it drip over the sides. Add icing to the sides as needed to completely cover the sides.
- Transfer the cake to serving plate and decorate with whipped cream fresh fruit and/or chocolate shavings.
- Refrigerate about 4 hours to allow flavours to meld. Can be made a day or 2 ahead. Keep chilled. Serve additional fruit and whipped cream on the side if desired.

Leave a Reply