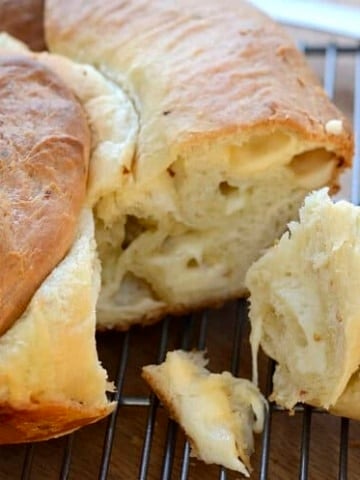
This No Knead Rosemary Garlic Bread is so easy anyone can make it! It only takes about 5 minutes to prep, let it rise, and bake. It is definitely worth the wait!

No knead rules! This rustic, hearty homemade bread is filled with flavor with the addition of garlic and rosemary.
What Makes This Recipe Special?
- It is so simple. Hearty, homemade bread in an hour and a half!
- 4 basic ingredients plus rosemary and garlic for aromatics, which are optional if you prefer just a plain loaf.
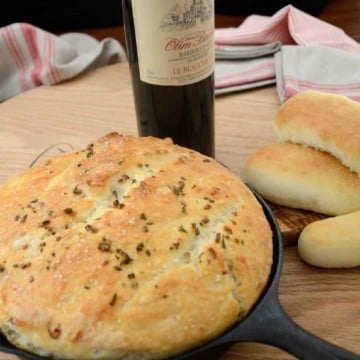
- This is rustic and 'stick-to-your-ribs'. Perfect for dipping in a bit of olive oil and balsamic or for a hearty sandwich.
Chef's Tip for No-Knead Rosemary Garlic Bread
- Weighing your ingredients, especially the flour, is far more accurate than using a measuring cup. An instant-read kitchen scale is a valuable investment. In this case, 524 grams of flour can vary from slightly less than 4 cups to almost 4 ⅓ cups, depending on the flour, how settled it is in its container, etc.
- A cast-iron skillet is perfect for baking this bread and getting a nice bottom crust. If you don't have one, then use a well-oiled cake pan.
Storage
Homemade bread doesn't have any preservatives (bonus!) so it is best the day it is made. It will be ok the next day but I tend to freeze what is left after the first meal - if there is any! I slice it first and then pop it into the freezer.
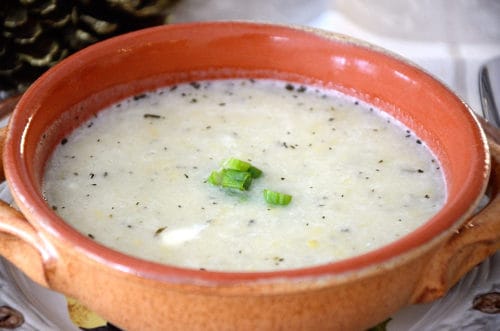
You might like to enjoy it with this Leek and Potato Soup!
FAQs
I have not done this, but you could substitute up to half the flour amount with whole wheat. You will need to increase the liquid by 1-2 Tbsps for each cup of whole wheat flour. Note your loaf may be even denser than the original.
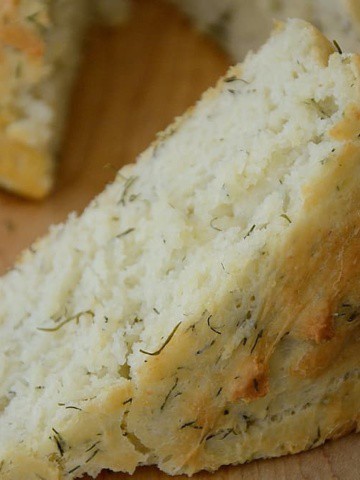
You could use any herb you would like to feature. Thyme or dill would work. You could also sprinkle the top with some caraway seeds if you like.
Related Recipes


No Knead Rosemary Garlic Bread
If you tried this, or any other recipe on my website, please leave a 🌟 star rating and let me know it went in the 📝 comments below!
Save Print Pin FacebookIngredients
- 2 cups lukewarm water (do not overheat or it will kill the yeast)
- 2 ¼ teaspoon dry active yeast
- ½ tablespoon coarse sea salt
- 4 ⅓ cups all purpose flour 554 grams
- 2 Tbsps fresh rosemary minced, reserve a bit for garnish
- 2 cloves fresh garlic minced, reserve a bit for garnish
- 2 Tbsps olive oil divided
- coasrse sea salt for garnish
Instructions
- Combine water and yeast in a large bowl.
- Stir in 1 cup of the flour with a wooden spoon. Mix until flour is fully incorporated.
- Stir in minced rosemary and garlic, reserving a bit for garnish.
- Mix the ½ tablespoon coarse salt evenly into the remaining 3 ⅓ cups of flour. Make sure it is evenly distributed. Add the rest of the flour 1 cup at a time, mixing until well incorporated before adding more.
- Cover with plastic wrap and let rise for 1 hour in a warm spot.
- Grease the cast iron skillet (8-10") with a bit of the olive oil. I dip a bit of paper towel in the oil and use it to grease the bottom and sides of the skillet.
- Remove the plastic wrap and flour your hands to prevent the dough from sticking. Pull the dough out of the bowl and shape it into a disk in the skillet.
- Cover with a towel and let rise for 30 more minutes.
- Preheat the oven to 400 degrees F.
- After the second rise, brush the olive oil over the top of the risen dough, sprinkle top with coarse sea salt and the rosemary, garlic garnish.
- With a sharp knife make 3 shallow, evenly spaced cuts across the surface of the dough.
- Bake for 30-35 minutes. Top should be nicely browned.
- Remove loaf from the skillet and let cool on a rack.
- Slice and serve when cool.

Dana
Fabulous! So easy to make and tastes delicious. I used dried rosemary instead of fresh, but it was still perfect.
Carolyn Hetke
Thanks for the feedback. Yes- it sure is easy!
Carolyn
Lynda
I had doubts about this bread as it was difficult to mix the flour with the water but perseverance paid off! This bread is the best I’ve had! Crispy on the outside and soft and flavourful inside because of the garlic and rosemary. I won’t ever make another bread to have with my soups and pastas. I do believe that IF there’s any leftover it will make the BEST croutons for salads.
Carolyn Hetke
Thanks for your feedback! MaybeI should highlight your experience in case others have the same issue. I am curious... did you wieigh your flour or use level cups. Not weighing could have made it drier so I am wondering.
Carolyn